Travis CI
本篇目为 Travis CI 搭建指南,以静态博客为例,覆盖构建、发布及通知流程。
前言
Travis 是一个用 Ruby 语言开发的开源持续集成软件,仅适用于 Github,对于开源项目免费使用,其配置文件极其简单,语言支持度更广,是 Github 当下最成熟的 CI / CD 工具。
说明
Travis CI 是容器化的 CI / CD 工具,通过简单配置根目录下 .travis.yml文件即可运行 CI / CD 服务。
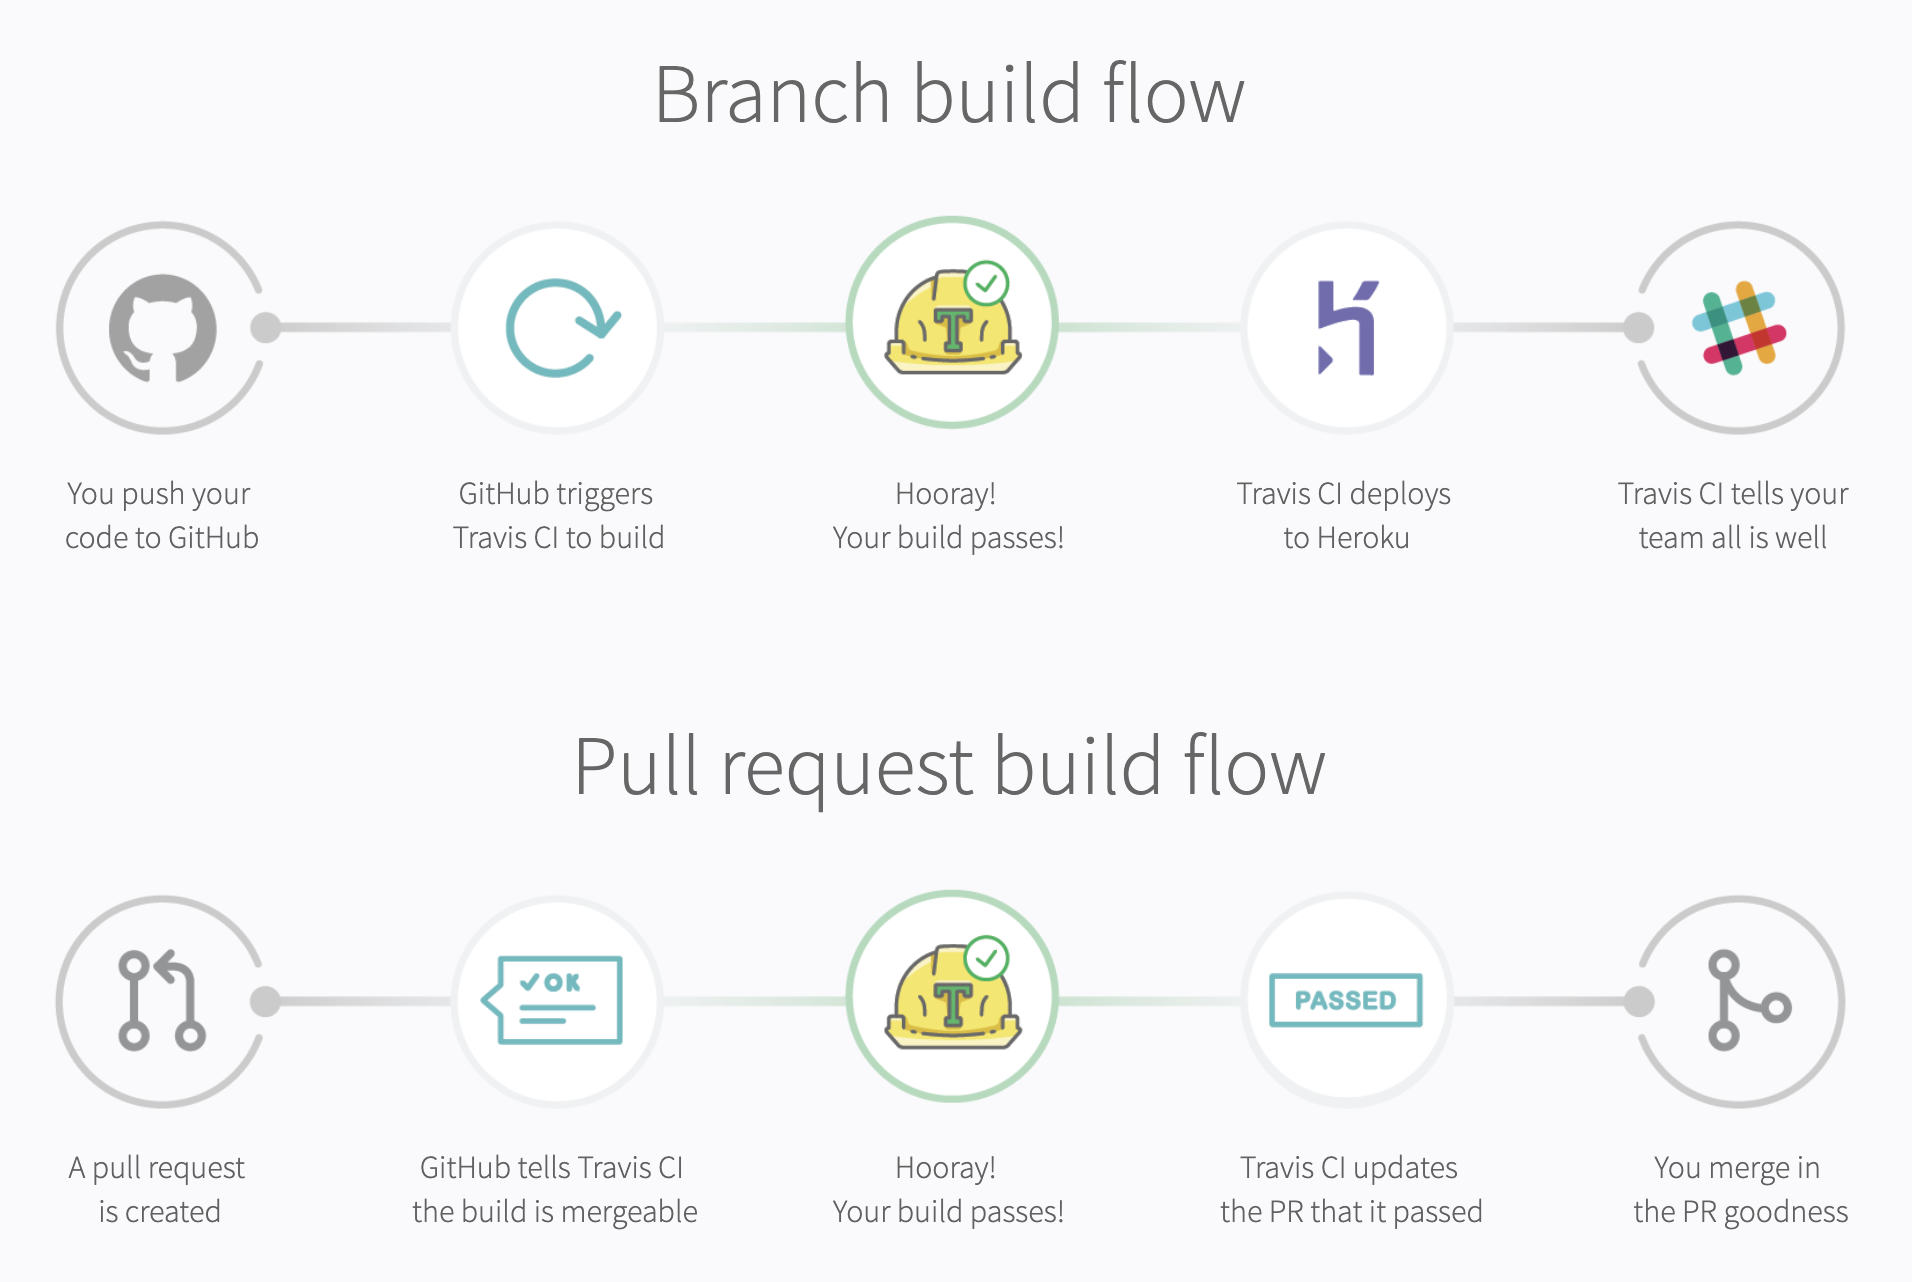
流程图
安装
可以通过 travis-ci | signup 或 github | marketplace来进行授权安装。
配置
授权组织及仓库后后进入 travis-ci | dashboard
添加构建运行时的私密信息
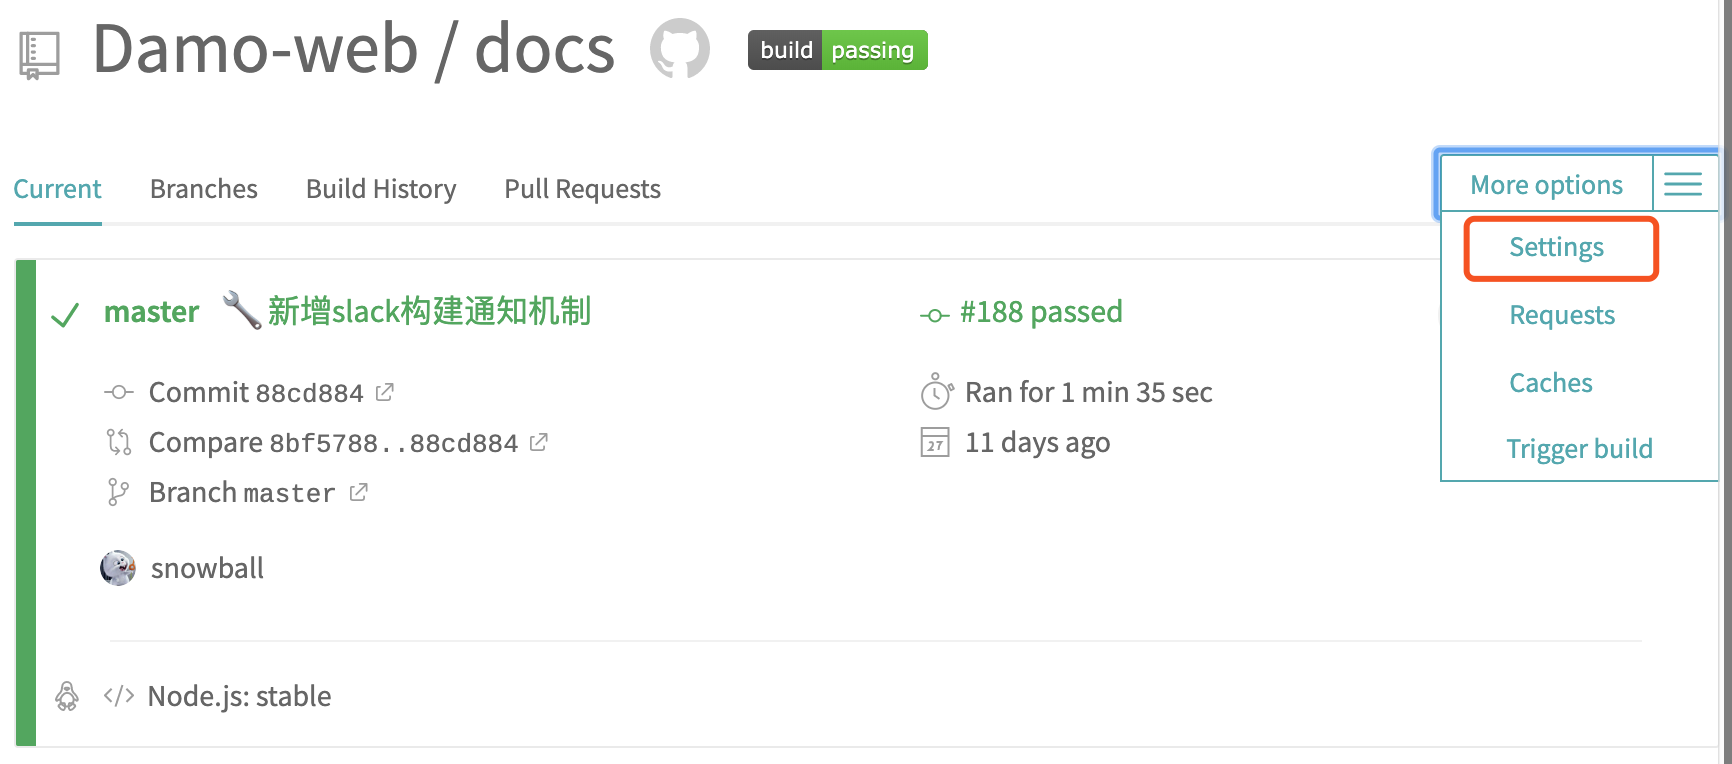
- 打开 Travis CI 仓库配置项:
- 添加所需环境变量:
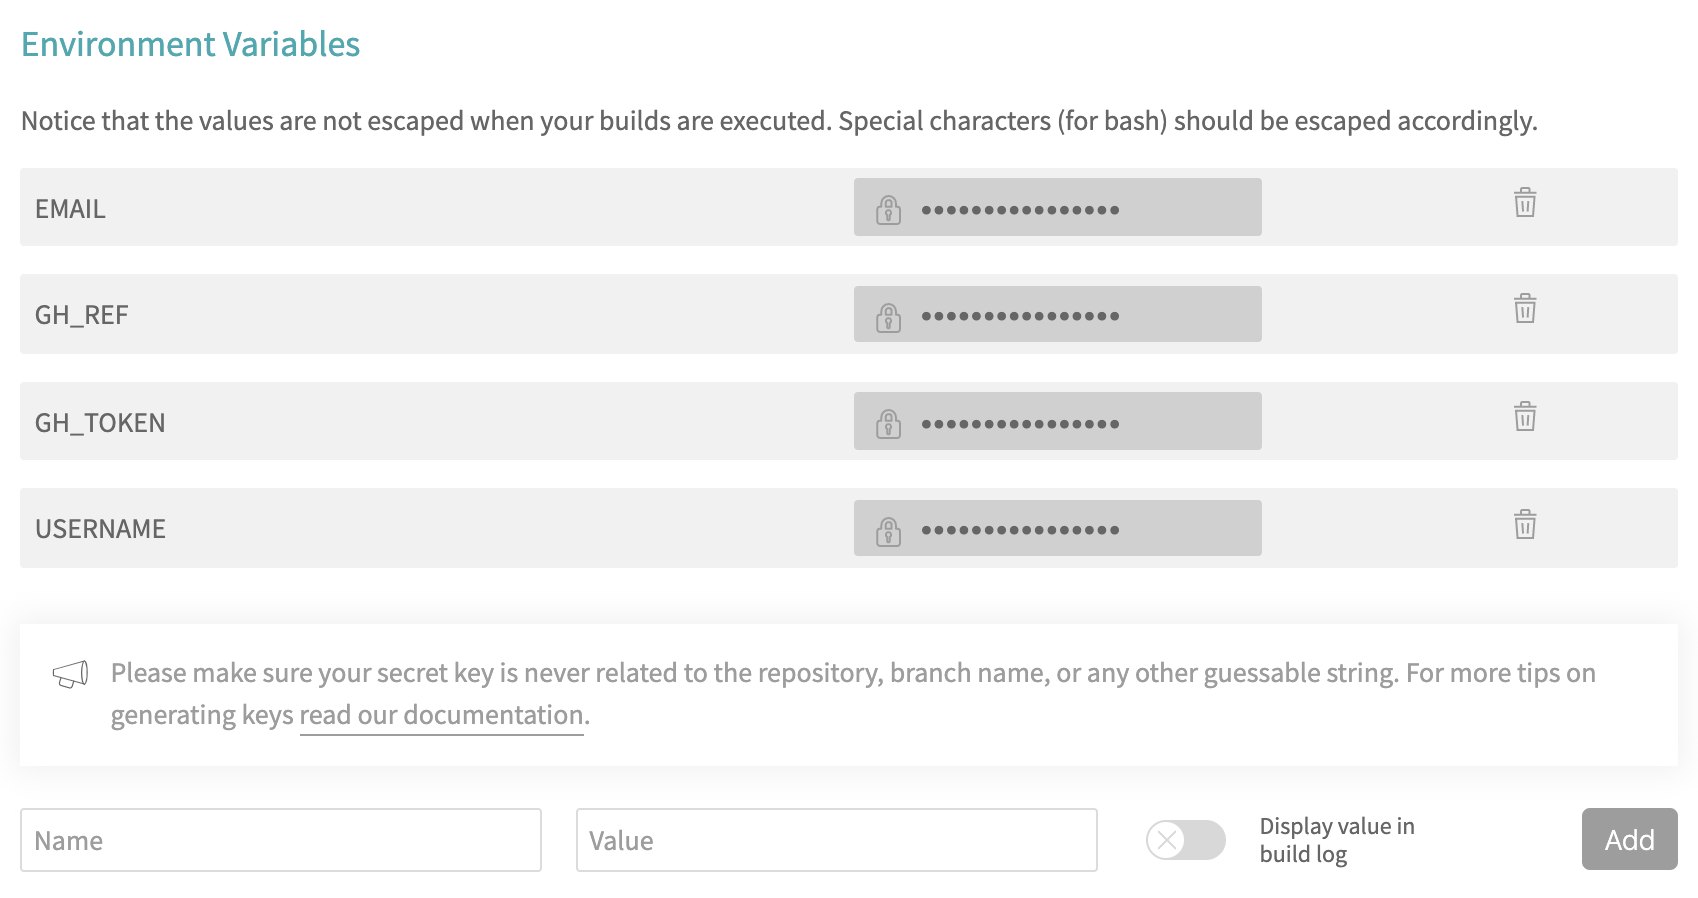
USERNAME 为 Github 用户名,EMAIL 为 Github 注册邮件,GH_REF 为 Github 仓库,GH_TOKEN 为 Github Token
关于 Github Token 即 Github Personal Access Token,具体生成步骤可参阅: Github | creating-a-personal-access-token
仓库根目录下配置
.travis.yml文件language: node_js node_js: stable cache: directories: - node_modules install: - yarn install before_script: script: - yarn build after_script: - cd ./dist - ls - git init - git config user.name "${USERNAME}" - git config user.email "${EMAIL}" - git add -A - git commit -m "[skip ci] deploy" - git push -f "https://${GH_TOKEN}@${GH_REF}" master:gh-pages branches: only: - master构建项目
按上述步骤或者参阅travis-ci | getting_started,向仓库监测分支推送代码即可触发构建
配置 Slack 通知
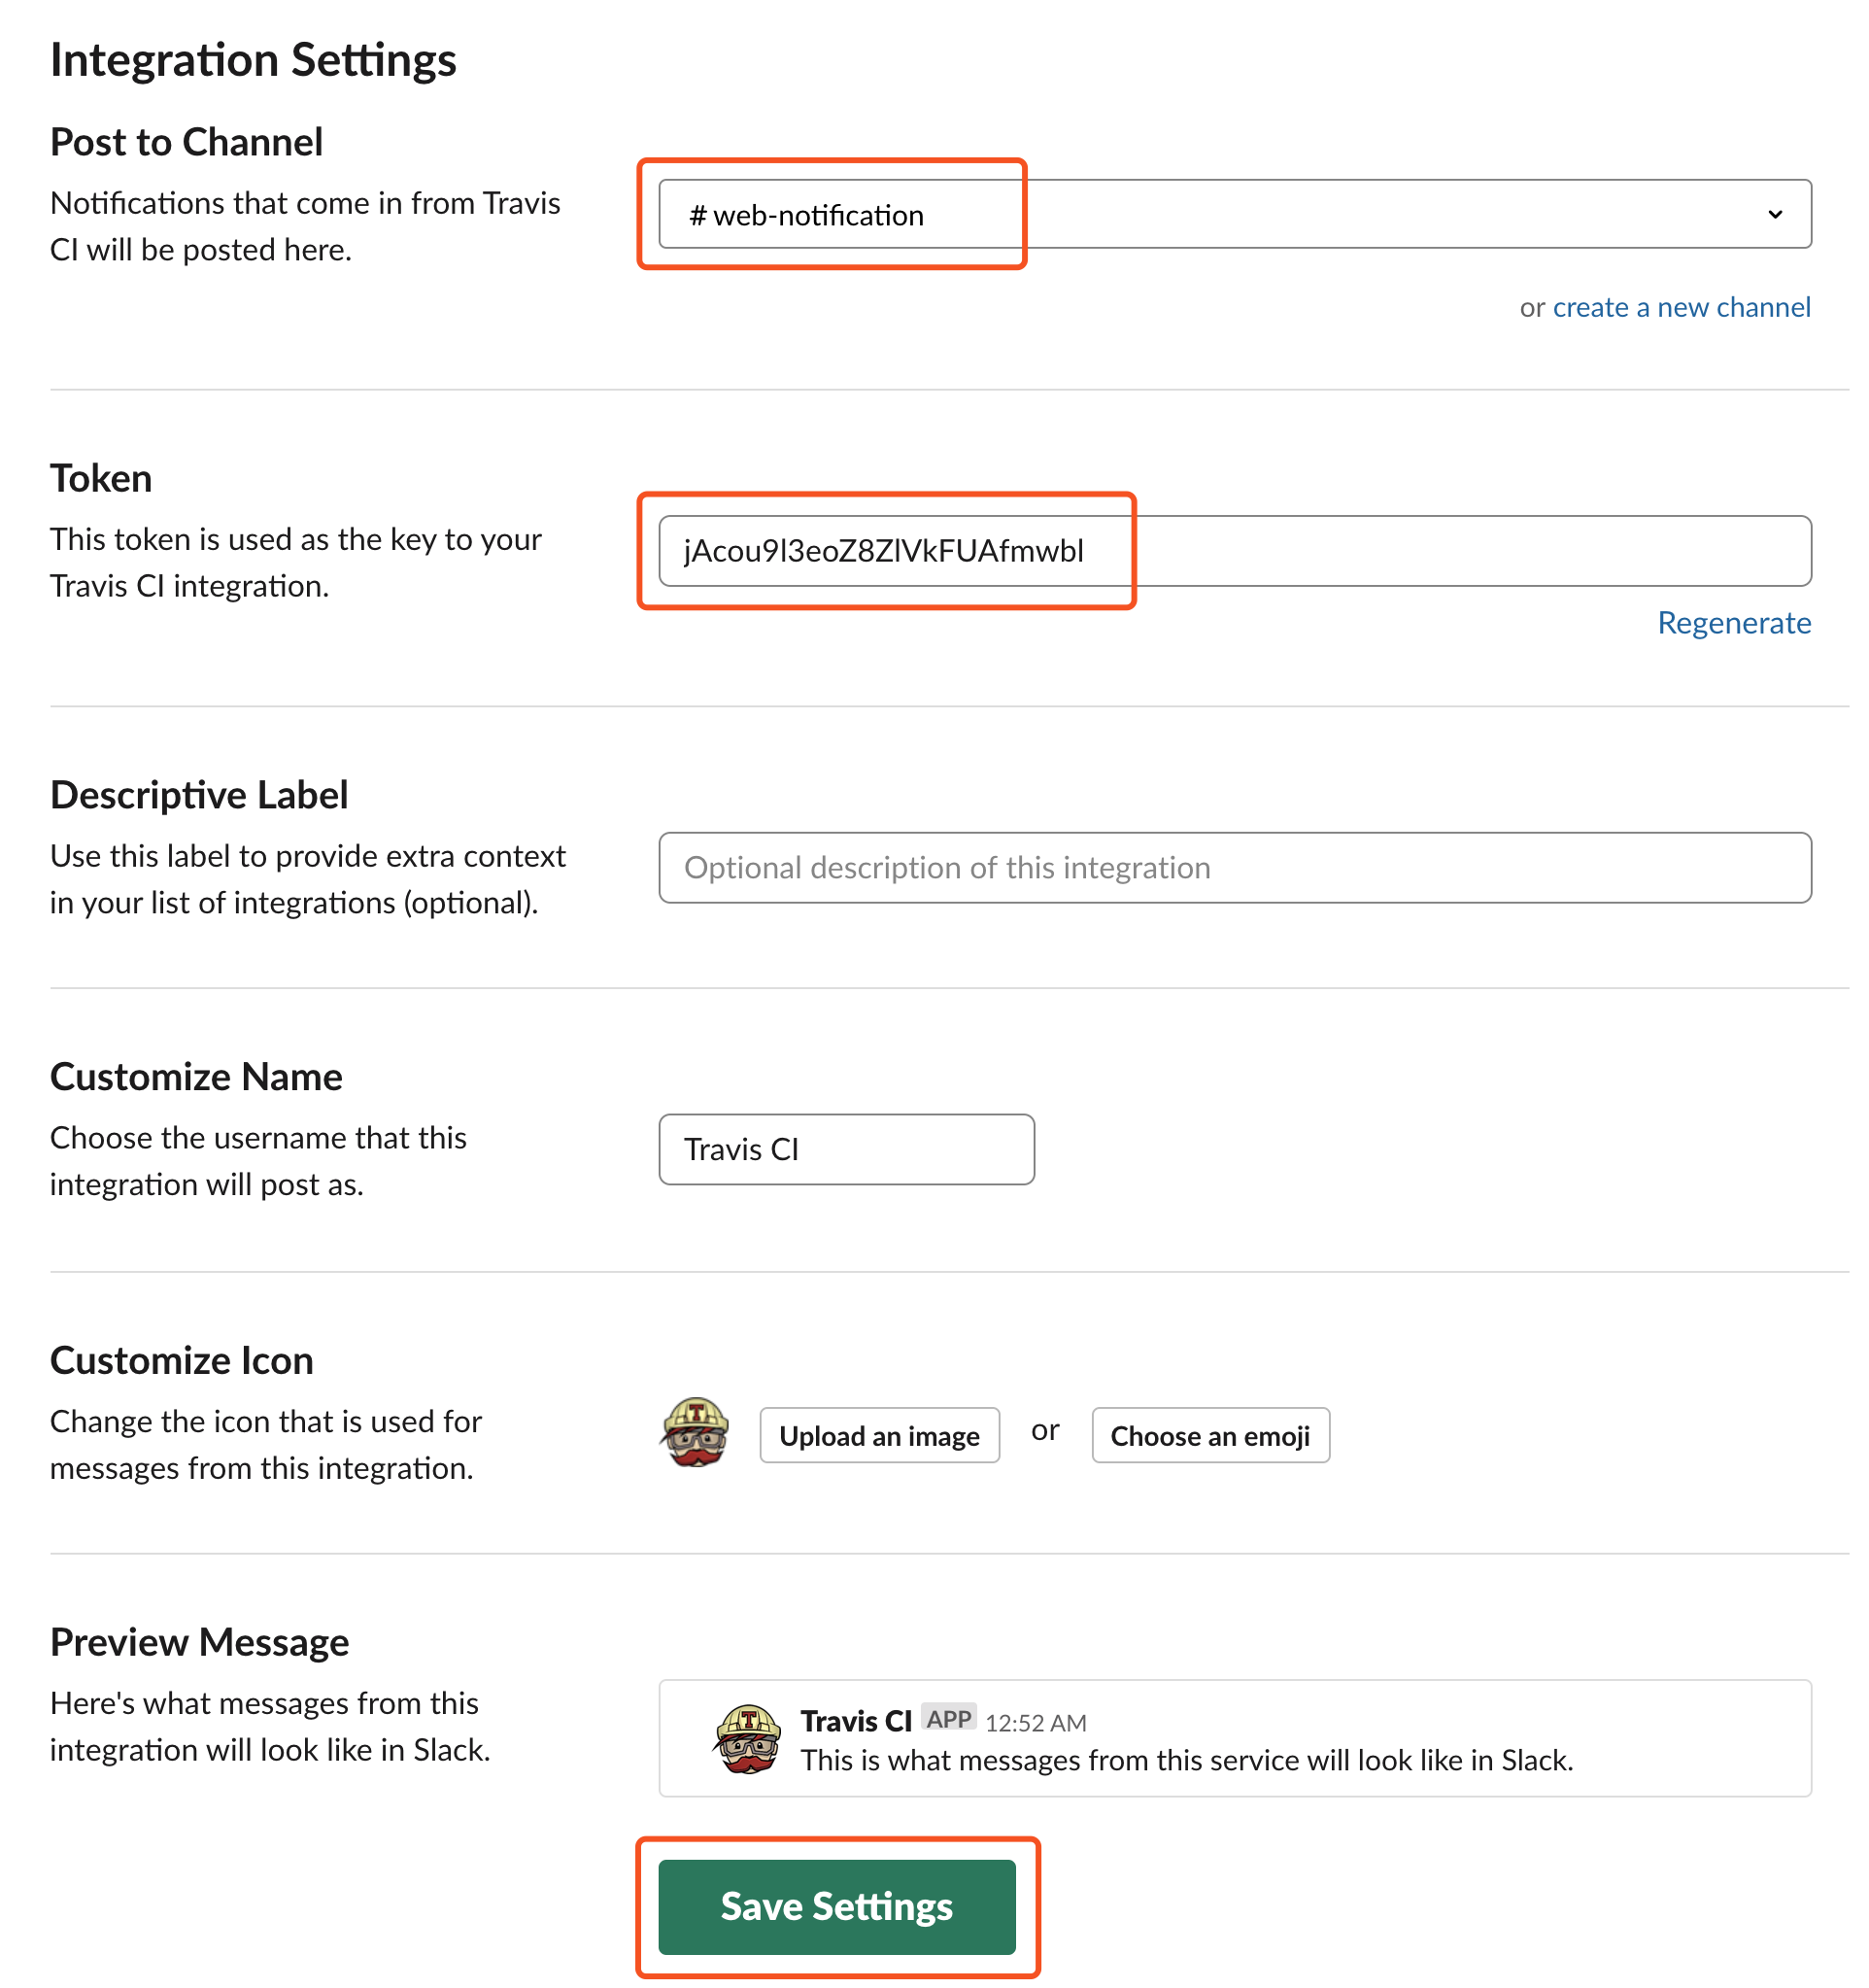
首先,在 Slack 网站 App Directory 页面,搜索 Travis CI 并获取 Token:
Travis CI 提供命令行来进行加密隐私信息,在使用其命令之前,需要在终端安装并登录:
# 安装 travis
$ gem install travis
# 所用域名为 https://travis-ci.com/ 需要加下 --pro
$ travis login --pro
We need your GitHub login to identify you.
This information will not be sent to Travis CI, only to api.github.com.
The password will not be displayed.

Try running with --github-token or --auto if you don't want to enter your password anyway.
# 输入 Github 用户名及密码即可完成登录
利用 travis encrypt 生成 Slack secure:
# 进入当前项目根目录,并确保 .travis.yml 文件存在
# 修饰符 --pro 必须加上,不然加密信息 travis 无法解析
# 修饰符 --add 会自动添加至 .travis.yml 文件
# 修饰符 -r 用于指定组织(个人)下的仓库,当仓库变动时,需要重新生成
$ travis encrypt "your-slack-workspace:0GSmTxDjyN0W0zxt2SkQWuTM#web-notification" --pro --add notifications.slack.rooms -r Damo-web/docs
查看
.travis.yml文件,并追加 Slack 通知信息:language: node_js node_js: stable cache: directories: - node_modules install: - yarn install before_script: script: - yarn build after_script: - cd ./dist - ls - git init - git config user.name "${USERNAME}" - git config user.email "${EMAIL}" - git add -A - git commit -m "[skip ci] deploy" - git push -f "https://${GH_TOKEN}@${GH_REF}" master:gh-pages # 新增 Slack 通知配置信息 notifications: slack: rooms: secure: eRBiyqpC+kBolvUuGHQJ1btBGzvr+vs5KJjMdRI3QJe8gbAekHrJDq3MwtIMZrVfmPXwVlZbRgK2e3dyQz+9Iidd5fRs3BIK65Hvcxxr2SpT8umgwOxhkysCpO6lGLYsneqVYro639kUz4xzo3Q4qED89N3prF1t7lKvHZ1kYfU7Nx4EkYk8R7xqDirB3cZKCveLQVjOz9hPCPU7YadB0VySCvosR+KNzSfHFleaJ/eoo4C+ozGPeY/45SZIFWBWnSnk4gIAkkDGusv+19AIDo6hds2FdoCkxmFyyk5fw91LI6Sss8vjtRMC4vFnSMWcWNudsbHa2bQl7EozX/sYQ9DBKrzS5pbiApgKGX4ngScnuppdUxq9f4pP+OiU4qjNjboQt2CLlo0Vc+Fy8NmpE+eriXw+gt8FyJImU+/tcpB0ANOqPUCKrlzrIybGIM3emIbsezKQL5LM92P+uILI5zVSWXgDanSabPGMF4hKTNaVdcMZgLZ8AMhKOc2x5+YMQ9kbt9UwQlXPe673aX6/nSxLonhxAJMhyjMyy8jjoFGQfEeFm9hlA3pUi1RR62lZajmp3c7S/6gJ3OxaJ/4kOiTgedOZJQiZkysFUnM3/SDsdD+MXcXgEY/hVbStUj2vzBzGlyDQGJoDsy8EfYlvt6qw83uy9bHjHFLvyPk0pJ0= on_success: always on_failure: always template: - Repo `%{repository_slug}`build (<%{build_url}|#%{build_number}>) for commit (<%{compare_url}|%{commit}>) - on branch `%{branch}` by `%{author}`. - 'Execution time: *%{duration}*' - 'Message: *%{message}*' branches: only: - master至此构建完成时,便会发送构建相关信息通知到 Slack 对应的频道。